In this Post , I will show you the steps to create a VM and connect the same to SSH clients like WinSCP . Additionally , I will configure the same to OIC and Perform a small operation on the same.
Before you go into the details , lets understand why do we provision a VM ..A VM or a compute instance is the place where you install/Deploy or run your applications . for Example you can install an oracle DB and it becomes DB server , if you install an application , it becomes an App server . On the other hand you can save it as reusable terraform stack for creating an instance with resource manager.
With this understanding , lets go into the detailed steps .
Login to the OCI Console via https://cloud.oracle.com/
Click on Hamburger menu > Compute > Instances
![](https://static.wixstatic.com/media/672833_6d4b387379e94c549c38592bb85d1ff2~mv2.png/v1/fill/w_770,h_297,al_c,q_85,enc_avif,quality_auto/672833_6d4b387379e94c549c38592bb85d1ff2~mv2.png)
Click On create Instance
![](https://static.wixstatic.com/media/672833_80b64e8f53f142b78352ea48e72929a6~mv2.png/v1/fill/w_676,h_198,al_c,q_85,enc_avif,quality_auto/672833_80b64e8f53f142b78352ea48e72929a6~mv2.png)
Provide the Instance name and choose the Compartment .
Placement options like AD, FD etc will be taken care by oracle
![](https://static.wixstatic.com/media/672833_d1d963f2116b451c852b9f0316fc5b6e~mv2.png/v1/fill/w_929,h_398,al_c,q_90,enc_avif,quality_auto/672833_d1d963f2116b451c852b9f0316fc5b6e~mv2.png)
Similarly , leave Image ,Shape and Networking to oracle for populating default values .
![](https://static.wixstatic.com/media/672833_c725f852b5564b878b4c2e71beac146d~mv2.png/v1/fill/w_942,h_336,al_c,q_85,enc_avif,quality_auto/672833_c725f852b5564b878b4c2e71beac146d~mv2.png)
In the Add SSH keys session . Download the Private key and Public key . These are needed to connect to OIC or SSH client.
Please note that the defaulted components like Shape , OCPU, Memory and networking components can be adjusted for production grade servers.
![](https://static.wixstatic.com/media/672833_572fdfdafc4c4f25b3d838b0c694e942~mv2.png/v1/fill/w_913,h_325,al_c,q_85,enc_avif,quality_auto/672833_572fdfdafc4c4f25b3d838b0c694e942~mv2.png)
In the Boot volume , check the In-transit encryption and hit create.
![](https://static.wixstatic.com/media/672833_ed3b7c98c0d541dca645fd35432f0cbc~mv2.png/v1/fill/w_970,h_348,al_c,q_85,enc_avif,quality_auto/672833_ed3b7c98c0d541dca645fd35432f0cbc~mv2.png)
you will see that the instance is up and running and also shows the information about public and private IP's
![](https://static.wixstatic.com/media/672833_8c4e118159fc4e1997e1cf532f394e8b~mv2.png/v1/fill/w_980,h_323,al_c,q_85,usm_0.66_1.00_0.01,enc_avif,quality_auto/672833_8c4e118159fc4e1997e1cf532f394e8b~mv2.png)
Simple right !
Lets go and connect to SSH client. using Private Key . I am using WinSCP and you can try with your tool of choice .
you need a Public IP and the user name and the Private key for successful connection .
![](https://static.wixstatic.com/media/672833_24debe7c2e464993b3222f6bee045040~mv2.png/v1/fill/w_494,h_432,al_c,q_85,enc_avif,quality_auto/672833_24debe7c2e464993b3222f6bee045040~mv2.png)
Under SSH, Click on Authentication and upload the Private key which got downloaded from OCI .
![](https://static.wixstatic.com/media/672833_0fb449570c0549b1abe2a31e63c35373~mv2.png/v1/fill/w_602,h_477,al_c,q_85,enc_avif,quality_auto/672833_0fb449570c0549b1abe2a31e63c35373~mv2.png)
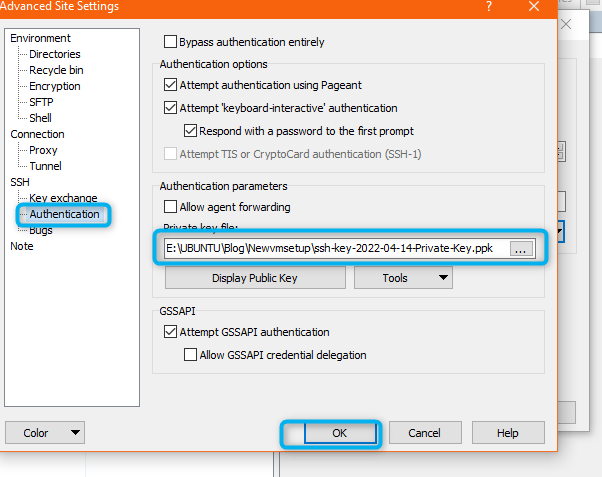
Just select the .key file and WinScp auto creates .ppk and upload the same.
In the Next step , Click signing and enter the user and you are in .
opc is the default user when created the VM in the root compartment.
![](https://static.wixstatic.com/media/672833_d70a5e4796da41ab839d3e269898e649~mv2.png/v1/fill/w_556,h_240,al_c,q_85,enc_avif,quality_auto/672833_d70a5e4796da41ab839d3e269898e649~mv2.png)
Now Lets connect the same to OIC.
first, you need to create a connection and then create an integration say to list files from the server .
OIC Connection :
Enter the public IP , Port and make sure keep the sftp value as "YES"
![](https://static.wixstatic.com/media/672833_4a89c51cd1cb4b76b26c9331d7cca441~mv2.png/v1/fill/w_953,h_494,al_c,q_90,enc_avif,quality_auto/672833_4a89c51cd1cb4b76b26c9331d7cca441~mv2.png)
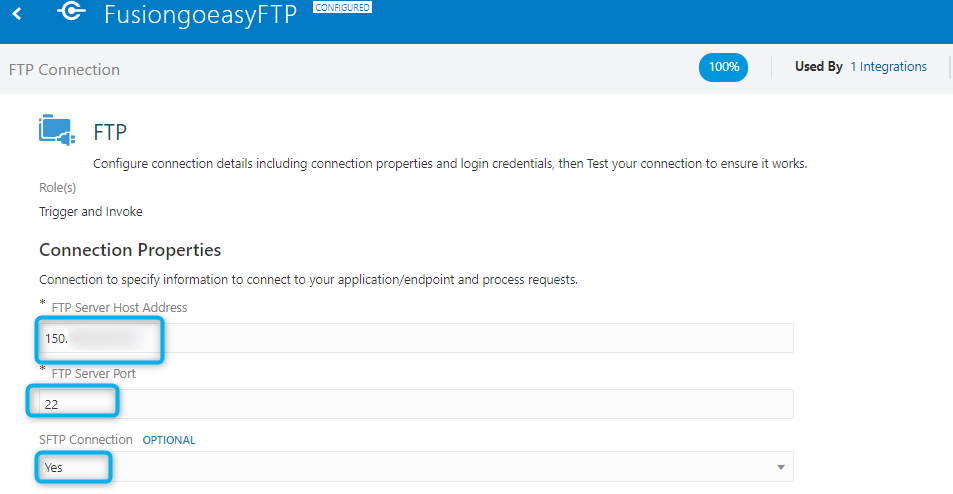
Now test the connection
![](https://static.wixstatic.com/media/672833_43c6ba897c9d44ee87faf39ba98a6b5c~mv2.png/v1/fill/w_710,h_169,al_c,q_85,enc_avif,quality_auto/672833_43c6ba897c9d44ee87faf39ba98a6b5c~mv2.png)
Second , Quickly Build an integration and perform the list file operation
OIC Integration :
![](https://static.wixstatic.com/media/672833_ffb94b02c8464d3096e44f716a08caaa~mv2.png/v1/fill/w_757,h_215,al_c,q_85,enc_avif,quality_auto/672833_ffb94b02c8464d3096e44f716a08caaa~mv2.png)
Third , test the same and see the response.
![](https://static.wixstatic.com/media/672833_d3ec808732fa4a4abb1181240ad94479~mv2.png/v1/fill/w_980,h_376,al_c,q_90,usm_0.66_1.00_0.01,enc_avif,quality_auto/672833_d3ec808732fa4a4abb1181240ad94479~mv2.png)
Hope this helps . happy learning.
Comments